
Waking with a colostomy bag after bowel surgery was something of a challenge. But the next one was just around the corner. Deciding on whether to use colostomy bags or irrigation was something that needed careful consideration.
The decision became necessary, in the first place, because, when I had my bowel cancer surgery, the surgeon found that my colon had ruptured. This required a fairly extensive clean-up but, no matter how thoroughly the surgeons washed my intestines, there was always going to be a high risk of infection. As such, instead of rejoining the ends of my large intestine and leaving them to attempt to heal in such an environment, the decision was made to draw the active end of my colon out through my abdomen, to make a stoma. Specifically, a colostomy. Hence the need for an answer to the colostomy bags or irrigation question.
As I’m typing this, something occurs to me: did the surgeons put my intestines back the way they found them? I bet they didn’t, did they?! I reckon it’s a complete mess in there, with bits of intestine going here, there and everywhere. How am I supposed to get a washboard stomach now? When everything’s so disorganised under there!? Admittedly, I’ve never actually had a 6-pack, but I might have wanted to one day…
But I digress. I woke up with a colostomy bag in place, because it’s the only option in the early days. I was shown how to use it and went home. Then I had regular meetings with the stoma nurses until the size of the stoma stabilised, at which point I was able to order my own supplies with pre-cut colostomy bags. I was left to my own devices but with the knowledge that the stoma nurses were always available if I needed them.
And I would need to see them shortly, because I’d been booked in with the stoma nurses for a lesson on irrigation.
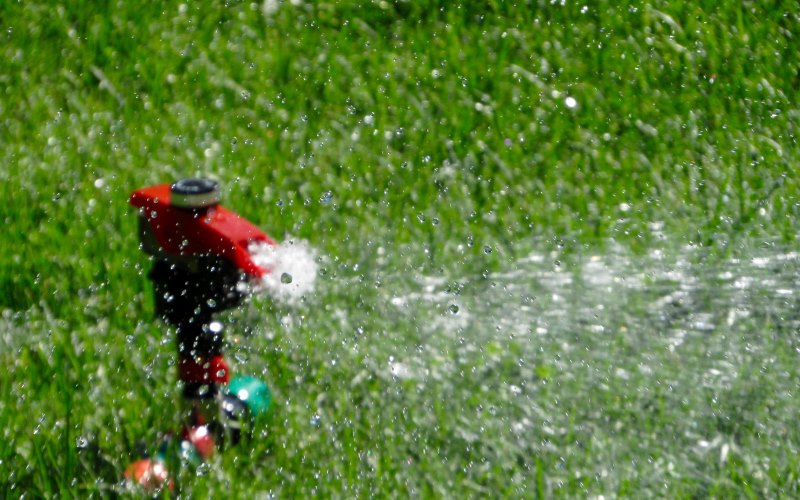
Photo by Anthony Rossbach on Unsplash
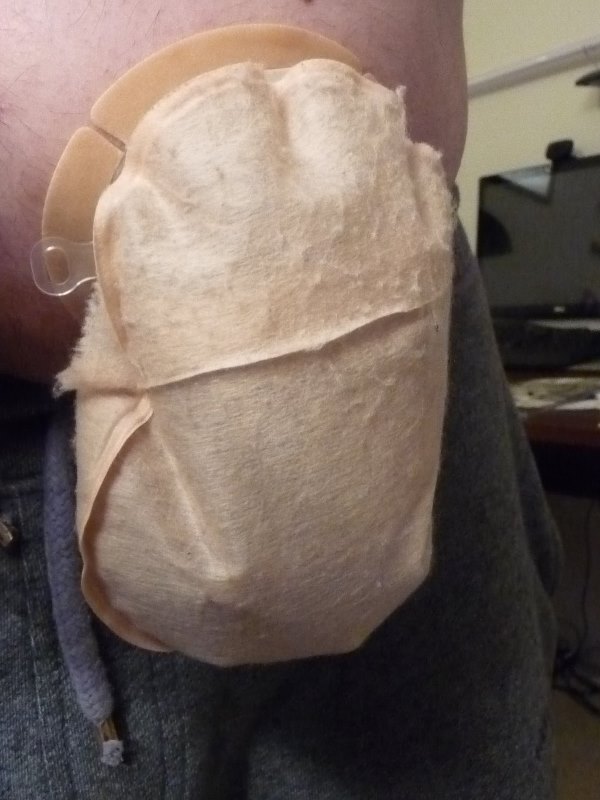
Most people with colostomies (colostomates), when faced with the prospect of colostomy bags or irrigation, opt to use bags to manage their faecal output. The bags are simply a pouching system that allows your body to follow its natural rhythm and simply collects whatever comes out, when it comes out.
For some people, though, this arrangement does not give them the control they need, so they prefer irrigation. The process of irrigation is to introduce enough water into your bowel to flush everything out, at a time that suits you. It’s effectively a daily enema for your stoma. Although, some people manage to irrigate only once every two days, but I imagine this involves a carefully managed diet.
Deciding on colostomy bags or irrigation isn’t easy, because both options have advantages and disadvantages. It comes down to personal choice, based on what’s involved in your life. But before you can make that decision, you have to attend irrigation training. This training can either be done in your own home or at the hospital. Mine was at the hospital, just after my second three months of chemotherapy finished, in February 2015.
The irrigation training is often left for a reasonable period of time, to allow the size of the stoma to settle. Also to prevent people from getting overwhelmed, which is particularly possible if you’re still receiving chemotherapy. I went in to the hospital not really knowing what to expect and fearing maximum awkwardness…
Sadly, my fears were not unfounded.
At this point, I would again like to sing the praises of stoma nurses and the amazing job they do.
Roughly speaking, using a bag is pretty simple: you glue the bag over your stoma, unstick it when it’s full and then glue another bag in its place. This is explained in more detail in my previous post. I’ve also got a video of the process. Once I edit the video, I will post in to YouTube; if I can get over the horror of what I look and sound like.
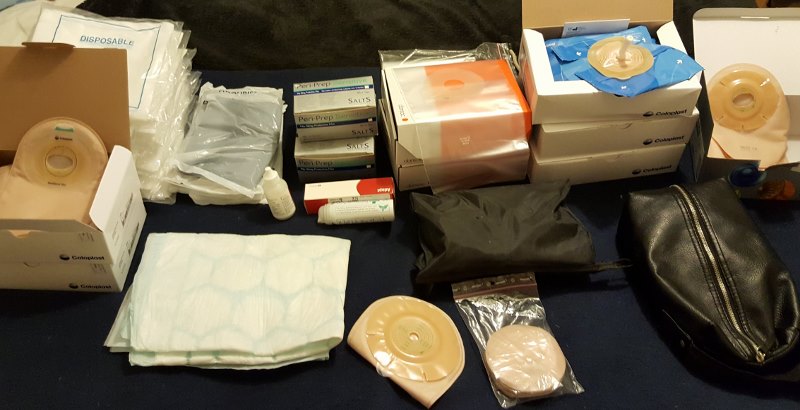
Irrigation, while following the same principles, is considerably more complex. Firstly, there’s the process of getting the water into you. Then there’s the process of getting everything out of you. This requires some specialised equipment. This equipment will be issued to you after the training. To irrigate, the equipment you will need includes:
- A water reservoir. It takes about two litres (4 pints) and needs to be hung above shoulder height.
- Tubing, with flow control, to get the water to you.
- A cone, to go on the end of the tubing, to get the water into you. Sort of like a funnel, in reverse.
- An irrigation sleeve, which is glued to you, that takes the waste away from you. The sleeve is open at both ends. The opening at the near end allows you to introduce the cone into the stoma. The opening at the far end rests in the bowl of a toilet. The irrigation sleeve reminds me of an elephant’s trunk, and shall, henceforth, be referred to as, an elephant trunk.
- A stoma plug or a stoma cap to go in place of the bag that would be there otherwise, at the end of the irrigation process.
All of this equipment was in place when I arrived at the hospital, except the toilet. Because we weren’t doing the training in a toilet or a bathroom, we were doing it in the training room. Instead of a toilet, there was a bucket! This was so I could be comfortable and relaxed in the nice comfy chair… In a training room! Taking a watery dump in front of a nurse! If I really think hard, it’s just about possible to remember a time when I was more relaxed and comfortable than during this training.
But, we went for it. I exchanged my bag for an elephant trunk and tried to get the cone into my stoma. This can take some getting used to because the stoma often doesn’t have a clear entrance. Basically, the pointy end of the cone is offered up to the stoma and gently nudged until it slides home.
It was then a case of wriggling the cone around until I could work out the direction that the bowel approached the stoma. It was easy to figure out because, with the cone in place, and the flow control open, the water started going in when it was lined up properly.

The water needs to be at about body temperature, for comfort’s sake. The process of introducing water into your bowel can induce nausea, which is why stoma nurses often prefer to do the training in hospital. If nausea is experienced, it is usually only during the first attempt. It does go away with time. I didn’t experience any nausea. I did, however, feel very full after about a litre (2 pints) went in.
If any of the following happens, it’s time to stop:
- You feel full,
- The water stops going in,
- You feel discomfort,
- The water starts escaping around the edge of the cone.
When one, or more, of these happens, close the flow control on the tubing and move the cone up and out of the way. As soon as the cone moves, water, and more, exits the stoma at an impressive rate. It travels down the elephant trunk to the toilet (bucket). To ensure this is the case, it’s important to keep the top entrance of the elephant trunk tightly shut…
Then it’s simply a case of repeating the process until the water exiting your body runs clear. In my case, this took something like 4 litres (8 pints), but the first time is always the worst.
I found the process messy, smelly and time consuming. For me, it was also extremely embarrassing because I was doing it in front of a stoma nurse. She, on the other hand, didn’t bat an eyelid; it’s all in a day’s work for her. Don’t let embarrassment stop you getting the training, it has the potential to make your life a whole lot easier.
And then, it’s all about giving irrigation a chance. When deciding on colostomy bags or irrigation, the bags have a unfair advantage; you’ve been using that system since day one. You’re familiar with it. Maybe even comfortable. I certainly was, but I was determined to give irrigation a go.
In the bathroom, I found a way to set up the equipment to allow a comfortable irrigation experience. I moved a folding chair up there, put it next to the toilet and hung the reservoir from the shower panel on the bath. I had all my changing disposables lined up next to the sink and easy access to all the warm water I could need. The irrigation itself would be done when everyone else had gone to bed. It was the perfect arrangement.
I lasted three days!
For me, there were two main negatives I just couldn’t get past: the time involved, and; the messiness.
In terms of time, I found that it took me less than 5 minutes to change a bag, and I had to change it two to three times a day. On the other hand, irrigation took close to an hour.
The irrigation was also smellier and messier. The reality is there was very little mess. There was, however, the potential for a lot of mess. While I’m confident that this ‘lot of mess’ would have been avoided, I didn’t like the thought of it. I’ve always tended to be a little fastidious when it comes to cleanliness, and that’s what tipped it for me. Between the increased time and the increased mess, the choice between colostomy bags or irrigation was fairly easy to answer.
Bags all the way…
I have another video of how to use the irrigation system, which I will also add to YouTube in due course.

There are other things that should also be considered during the colostomy bags or irrigation dichotomy. The first of these is routine. With irrigation, you need to maintain a set routine. You irrigate at the same time each day. This routine needs to be kept, even when you’re away from home, including on holidays. But, once the routine is established, unless there are problems with diarrhea, you’re all set. If there are problems with diarrhea, you’ll need to use bags for the duration of the problem. This means you always need to have a supply of colostomy bags with you.
With bags, on the other hand, you are at the whim and mercy of your intestines. The bag will fill, when the bag wants to fill. There’s nothing you can do about it. This may mean it needs changing within the next 5 minutes. This can happen wherever you may be. If this means you don’t have access to a bathroom, you need to be able to change your bag without a bathroom. Potentially in public. And you always have to have your changing kit with you. To be fair, this doesn’t happen very often, but it does happen. It happened to me more than once.
In terms of equipment, this will always be a consideration. But generally speaking, in the colostomy bags or irrigation competition, this is a win for irrigation. If you’re using irrigation, you don’t usually have to have equipment with you. If you think you might have a dodgy belly, you’d likely carry something, otherwise not. With bags, however, you need to get used to wearing a backpack. When it comes to holidays, you have to pack slightly more with irrigation, but not significantly so.
And then there’s the subject of intimacy, this is another tick in the irrigation column. In terms of intimacy, the colostomy bag is the very opposite of alluring. The phrase, ‘passion killer’ springs to mind. You are, however, offered an elasticated anti-hernia belt. This is for use in exercise; (field) hockey, in my case. The belt can also be useful at… other times. And, while a black, elasticated anti-hernia belt is never likely to be described as ‘sexy’, it can make what might initially seem an impossible situation, attainable. The stoma cap that goes with irrigation, while also a very long way from an aphrodisiac, is the hands down winner. Especially if under the belt.
There’s also the issue of farting. But here, in terms of colostomy bag or irrigation, it’s a draw. The colostomy bag and the stoma cap both have filters that allow air to pass through. In both cases, a stoma plug can be worn instead. The plug doesn’t allow anything to pass. It can get a little… backed up, at times. So care is needed when changing a plug.
The filters are, however, very effective, when it comes to odours. The filters can be, though, a little prone to blocking when there’s too much moisture in the air. This can sometimes result in whatever you’re wearing, cap or bag, becoming inflated. At this point, the cap or bag needs to be changed as a matter of urgency, because it will start trying to pull itself off your skin. And it’s glued in place. And you don’t want that particular bit of skin to become torn, or even sore, because you still need to glue things back on.
Those using bags will definitely have a change kit available, allowing a speedy change. This is also why those using irrigation should consider keeping a small, emergency change kit about their person. This is a fairly rare occurrence but certainly can happen. If you are naturally prone to wind, or have eaten something that results in increased amounts of wind, bear this in mind.
So, when deciding on colostomy bags or irrigation, there are a lot of good reasons to choose irrigation. I chose not to choose irrigation; I chose colostomy bags.
And they worked for me. But not without the odd trial and tribulation. I’ll look at the day to day processes of living with a colostomy bag next time.